Displaying Coding Stripes

To display coding stripes for a source or node:

  1. Open the required source or node— it is displayed in Detail View.

  2. If you want to view coding stripes for selected content, select the required content.

  3. On the View menu, click Coding Stripes.

  4. Click the required display option  

    Option

    Description


    Selected Item / Select Item...

    The Select Project Items dialog box is displayed and you can select from nodes, attributes or users that code the item.

    Expand parent items to see the child items.

    If the required items are in a set, you can select the set.

    Use the Filter button to display only items matching a specific criteria. For example, you could filter the node selection to only nodes created today. Click theSelect All button to automatically select items matching the criteria.

    Nodes Most Coding

    Of all the nodes that code this item, display the most frequently used.

    Nodes Least Coding

    Of all the nodes that code this item, display the least frequently used.

    Nodes Recently Coding

    Of all the nodes that code this item, display the most recently used.

    Coding Density Only

    Show only the Coding Density bar.

    Show Items Last Selected

    Show the nodes that were last selected for viewing. This option can be useful when you want to check coding at the same nodes across multiple sources.

    Number of Stripes


    When you choose either of the most, least or recently options, this function becomes active and allows you tochange the number of coding stripes displayed.

    When you choose the most, least or recently options, the default number of stripes displayed is 7. You can change this default in the ApplicationOptions (Display tab)or in the View menu (Coding Stripes).

  5. If displaying more than 7 stripes, you can:


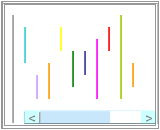
Drag the border to resize the coding stripes panel


_


|

Use the horizontal scroll bar
to see more coding stripes


In the  Application Options (Display tab) , you can specify that you want coding stripes to display automatically when you open a source or node. You can also set the default for the number of coding stripes that are displayed.

On the View toolbar, click on the View Coding Stripes button:

                                                   |


Displaying Sub-Stripes

You can choose to display the sub-stripes of a coding stripe— for example, from a coding stripe for the node Motivation, you can show sub-stripes to see which users have coded the current content to that node. From a coding stripe for user KMC, you can split the stripe into sub-stripes that show each node KMC coded at.

To display sub-stripes:

  1. Right-click on the required coding stripe.

  2. Click Show Sub-Stripes.

  3. Select the sub-stripe to display. This menu will display up to 9 sub-stripes only.  

To select other sub-stripes, click on More Sub-Stripes.

The Select Project Item dialog will display.

You can hover over a node coding stripe to see the users who coded the content, or hover over a user coding stripe to see the nodes the user coded the content at.

Related Topics